GLUE & ACCESSORIES
DIY Headboard Perfection: The Crucial Role of Foam Adhesive and Expert Tips"
Embarking on a DIY headboard project involves more than just the right materials; it requires attention to detail and the right techniques. Learn why foam adhesive, coupled with expert tips like using a silicon spray, is indispensable for achieving the perfect blend of comfort and aesthetics in your custom headboard creation.
Why Foam Adhesive Matters for DIY Headboards
Creating a DIY headboard involves more than just choosing the right fabric. The foundational element—the foam—requires a secure attachment to the board for lasting results.
Enhanced Comfort:
Foam-Adhesive: Using a high-quality foam adhesive ensures that the foam is securely affixed to the headboard. This not only prevents shifting but also enhances the overall comfort, providing a stable and supportive surface.
Professional Look:
Headboard-Glue: Opting for a specialized headboard glue guarantees a professional finish. The adhesive creates a seamless bond between the foam and the board, eliminating unsightly gaps or uneven surfaces.
Durability and Longevity:
Upholstery-Adhesive: A durable upholstery adhesive is designed to withstand the test of time. By securely bonding the foam to the headboard, you ensure that your DIY creation remains intact and beautiful for years to come.
Foam-to-Fabric Bonding:
Foam-to-Fabric-Glue: Beyond just attaching the foam to the board, the right foam-to-fabric glue facilitates a strong bond between the foam and your chosen fabric. This additional layer of adhesion prevents fabric sagging and ensures a polished appearance.
The Importance of Gluing Dacron to the Foam
Taking your DIY headboard to the next level involves not only gluing the foam to the board but also securing the perfect layer of comfort with Dacron filling.
Plush Comfort:
Dacron-Filling: Applying Dacron filling to the foam adds a luxurious layer of softness. Gluing the Dacron to the foam with a suitable adhesive ensures an even distribution, creating a plush and inviting surface.
Preventing Shifting:
Dacron-Attachment-Adhesive: Choosing a strong Dacron attachment adhesive prevents the filling from shifting within the layers. This stability guarantees that your headboard maintains its desired shape and comfort level.
Noise Reduction:
Foam-Attachment-Adhesive: The right foam attachment adhesive not only secures the Dacron but also aids in noise reduction. Say goodbye to squeaky sounds as the adhesive creates a solid bond, enhancing the tranquility of your bedroom.
Expert Tip: Transitioning Fabric Smoothly
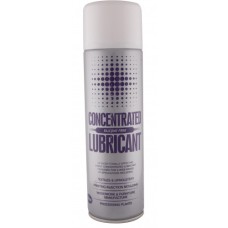
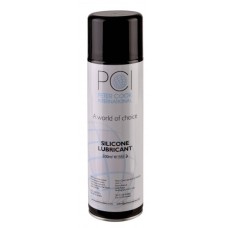
In addition to proper adhesion, achieving a seamless transition of fabric over the foam or Dacron is crucial for a professional look. Consider using a silicon spray to facilitate the process. A light application of silicon spray helps the fabric glide smoothly over the foam, ensuring a wrinkle-free and polished finish.
Neutralizing the Glue:
Additionally, a silicon spray can act as a neutralizer for glue. Once the adhesion process is complete, a light spray of silicon helps neutralize the adhesive, preventing any residual stickiness and ensuring a clean and professional result.
Elevate Your DIY Headboard with Expert Techniques
In conclusion, the glue you choose plays a pivotal role in the success of your DIY headboard project. From ensuring the secure attachment of foam to the board with specialized headboard glue to enhancing comfort and stability with Dacron filling, each adhesive step contributes to a final product that's not only visually appealing but also built to last. Make the right choice, and let your DIY headboard shine with the perfect blend of form and function, complemented by expert tips for a smooth and flawless
-228x228.jpg)
